
Four Corners APRON
The four corners APRON by Vanilla Design House (P132)
I have never owned an apron my whole life (…is this weird? 😧 am I the only one? Please tell me no!😅), but for some reason sewing one up made me so excited, especially with this beautiful fabric combination and the pattern in hand, courtesy of my mother-in-law ☺️


Here are details:
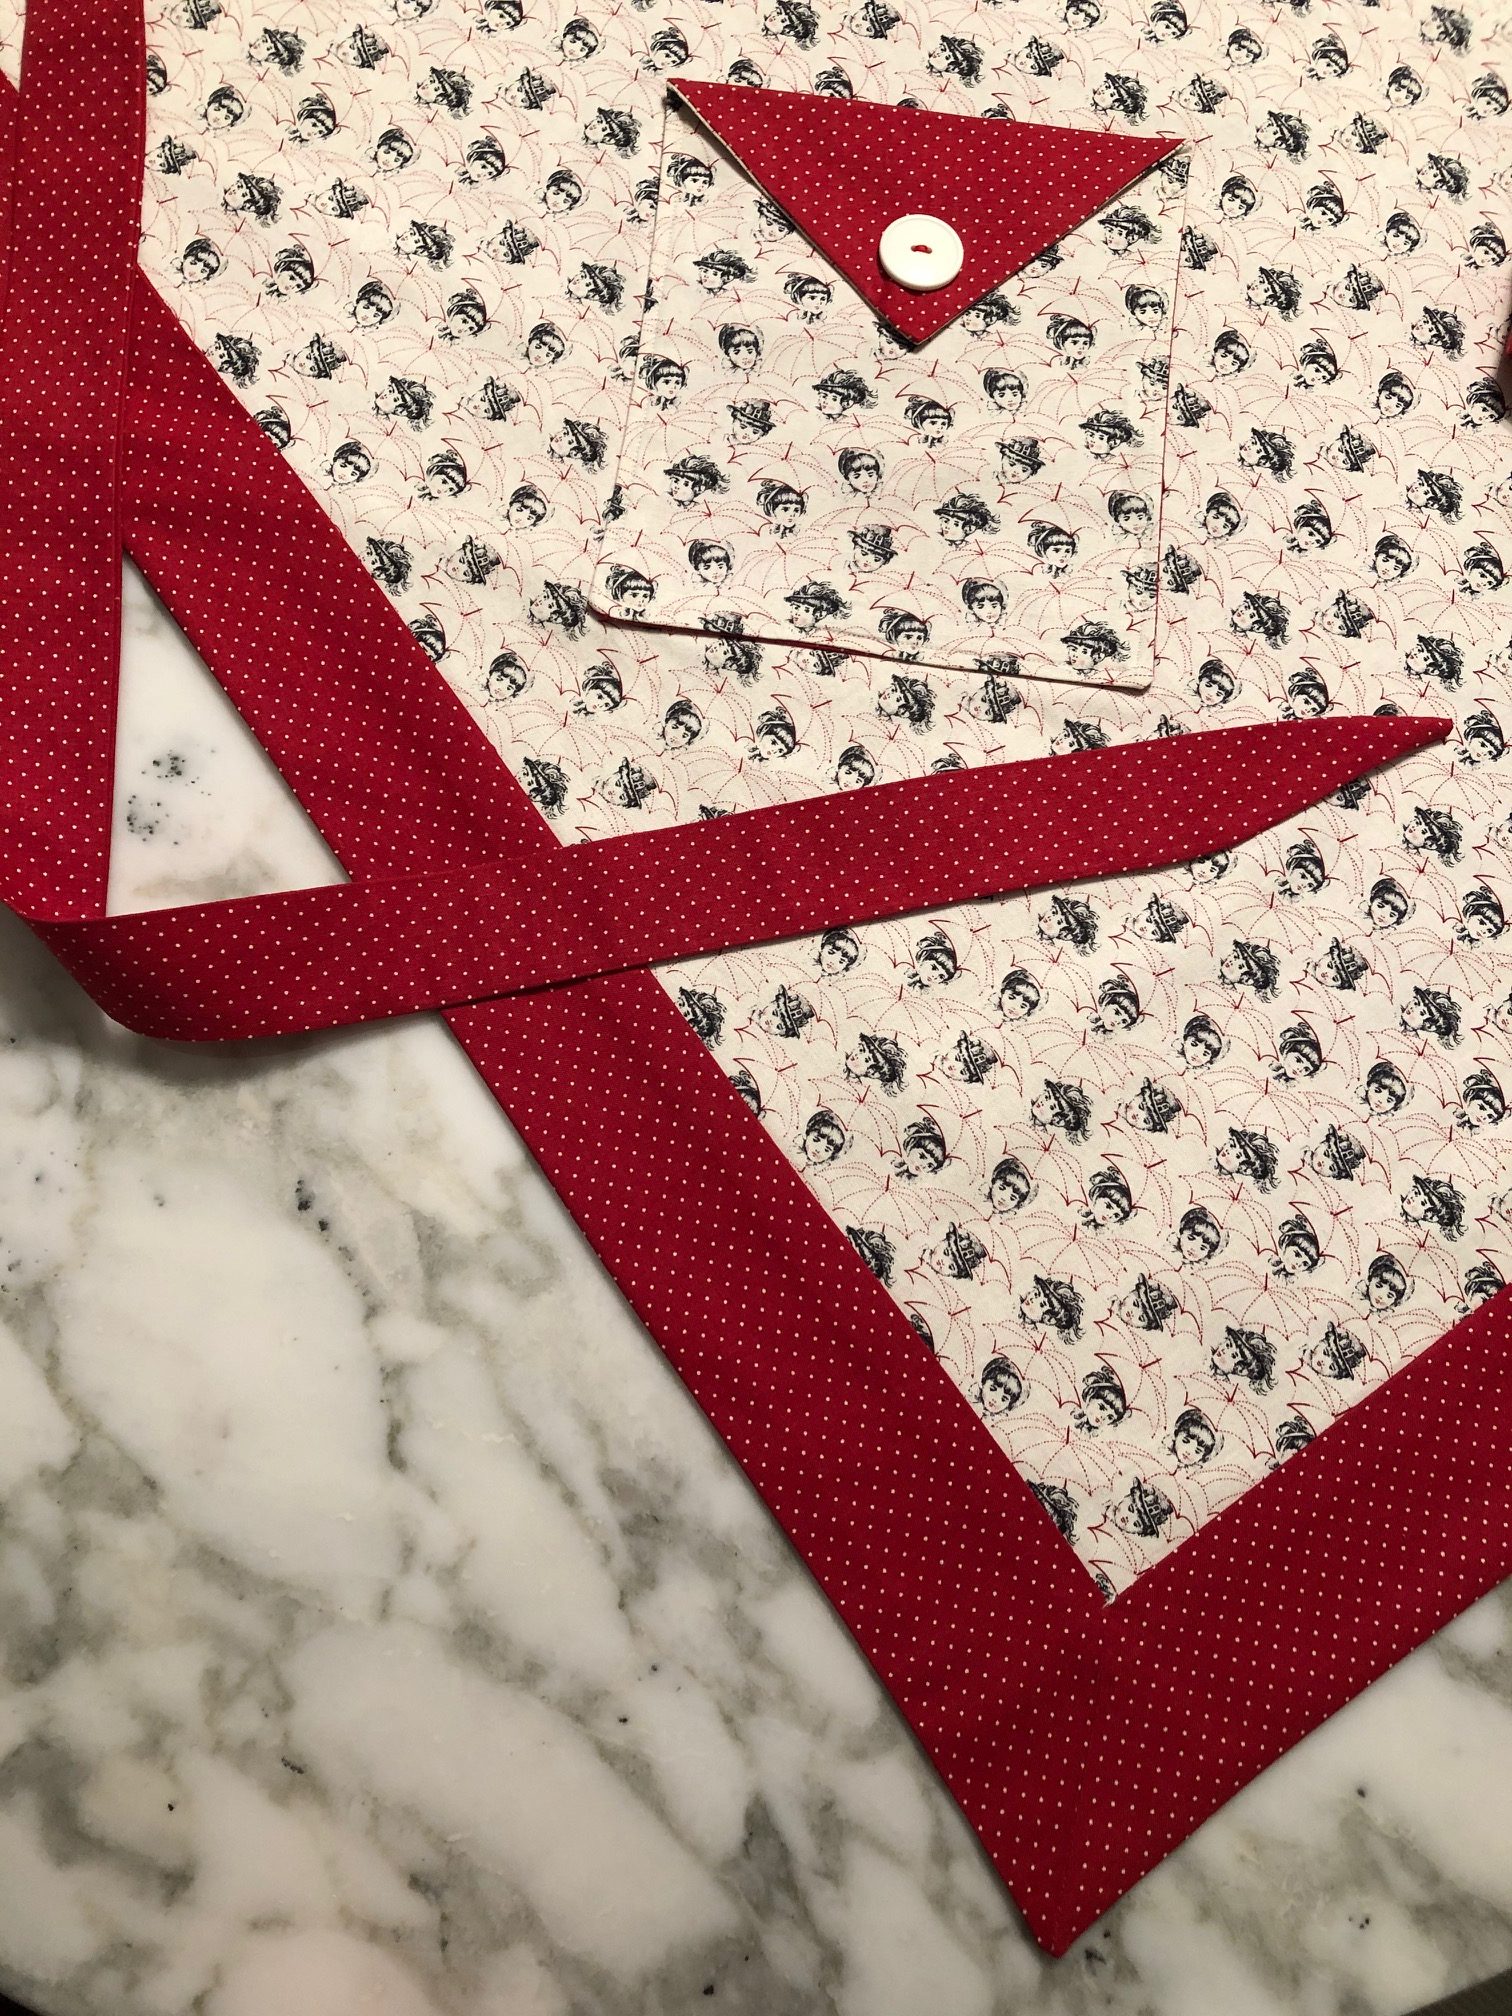
Because of the nature of this design, which was super straightforward, there were no patterns included, rather instructions to follow. You can make this apron in various fabric combination that your heart desires (or even using one type of sold or print fabric) but I decided to match the front of the body and the pocket with the a print fabric while using a red poka-dot one for the reverse side (which would make red turn-over on the neckline and top of the pocket). I picked the same red fabric for all the straps and I regret nothing! 😁♥️ Below is all the cuts put together!

I cut all my pieces according to my size (which is petite). They included:
1 neck strap
2 large body squares (1 front and 1 reverse)
2 botton trims
2 waist ties
2 pockets
Notions used: 2 bottons
First started by sewing the red bottom trims to the front. (Yes please ignore the two seam allowance lines below, no clue why that happened but being a perfectionist I was ripping the seam here for a re-run 😁). You end up with quite a bit of seam allowance at the end corner, which is later on used for the mitered corner (more on this later!). I pressed the first trim open and moved forward with sewing the second bottom trim until meeting the end of the seam for the 1st trim, as shown on the right image below:


Once completed, I pressed open the second trim and it ends up looking like this:


NOW here is my rant on the hardest part of making this apron: The Lovely Mitered Corner!! 💁🏻
So the goal is to join the two hanging tails and sew them to a 45° angle to make a perfect 90° degrees corner. You can look up ‘mitered corners’ on youtube to find several ways you can implement this but here was my approach:
As shown in the left image below, I placed the right sides of the tails together to make a crease at 45° angle (use a right angle ruler to verify and adjust accordingly), then I pressed and pinned in place (using at least three pins, not shown, so the fabric does not twist). I traced the crease on the wrong side of the fabric with a water soluble marker (blue line on right image), folded the entire apron so the right sides were facing and then sewed on the marked line from the outer corner of the red trims inwards until meeting the already sewn corner of the print fabric. I hope I didn’t lost you here…


I cut the excess fabric afterwards, trimmed and pressed open the seam allowance and did some edge zig zag stitching, resulting in this. Not too bad for my first mitered corner, righttt? 😍

I learned so much from this section (even though a bit frustrating at some point) but I am so proud of my 1st mitered corner. It isn’t perfect but I love it so much and I can’t wait to apply what I learned to make the next one even better. 🙌🏻
Now that I conquered the hardest part, it was all downhill from now on 💃🏻
I sewed up the pockets, facing the right sides together, inverting the inside out and top stitching the opening from which I turned them inside out, followed by top stitching on the centre-left of the front apron. (Note: you sew the pocket before sewing the reverse side of the apron, so it’s only top-stitched to the front side.)


It was now time to sew up the reverse side of the apron with right sides facing, leaving an opening to pull the inside out. After that, I ensured to cut the corners’ seam allowances in a curved shape in order to make the corners as sharp as possible.


And lastly, I sewed up the waist ties as well as the neck strap with folding the fabric so that the right sides are facing, and using a long sharpie (any tube would do) to push the inside out. See below:


For the neck strap, I followed the same step as above and then pinned to the desired height on the neck line, and sewed away !😊 Easy peasy!


Last but not least! And the most important part was the scrunchy I made to go with this whole outfit 😍 because why not! All that red poka dot leftover fabric was calling my name for it so here we go! Me posing here being super proud of that little thing! 😂

And here are more photos of the finished apron! Love Love love!


I have been wearing it non-stop, wondering where aprons have been my whole life. I love the sentimental value of the me made pieces even if in reality it was never something you had used before. I am obsessed with this apron and will be rocking it in the kitchen until I am 90 years old! ☺️
And that wraps up this little cute apron project! 😍 Thank you for checking this post out! I had so much fun putting this together and I really hope you enjoyed reading about it. Let me know your thoughts in the comments below! Would love to hear from you 🤗
Until next time!
xo
A


